[Previous entry: "Kerry Thorley bio published"] [Main Index] [Next entry: "More celebration of the end of the ban"]
09/14/2004 Archived Entry: "Building AR-15s from kits"

CELEBRATING THE END OF THE BAN. Some people just don't waste any time. :-)
Building AR-15s from Kits
By Ian McCollum
Wolfesblog Roving Blogispondent
Huzzah! The AWB, in all its repulsiveness, is dead! Since such an event requires celebration, a couple of my friends decided to commemorate it in the most appropriate way they could think of: making rifles that would have been illegal before. I tagged along with them, to get an idea what the build process is like.
The rifles chosen were AR-15s, because they are common, supposedly simple to build, relatively cheap, and simply fun. The plan was to buy completed receivers (making unregistered ones from unfinished blanks will come soon enough) and complete parts kits, and assemble them into working rifles.
We started with Rock River Arms stripped lower receivers at a gun show, where we found a deal on them - just $100 each. Rock River has a good reputation, and the added irony of building "assault weapons" on receivers made by a company in Illinois was savored all around.
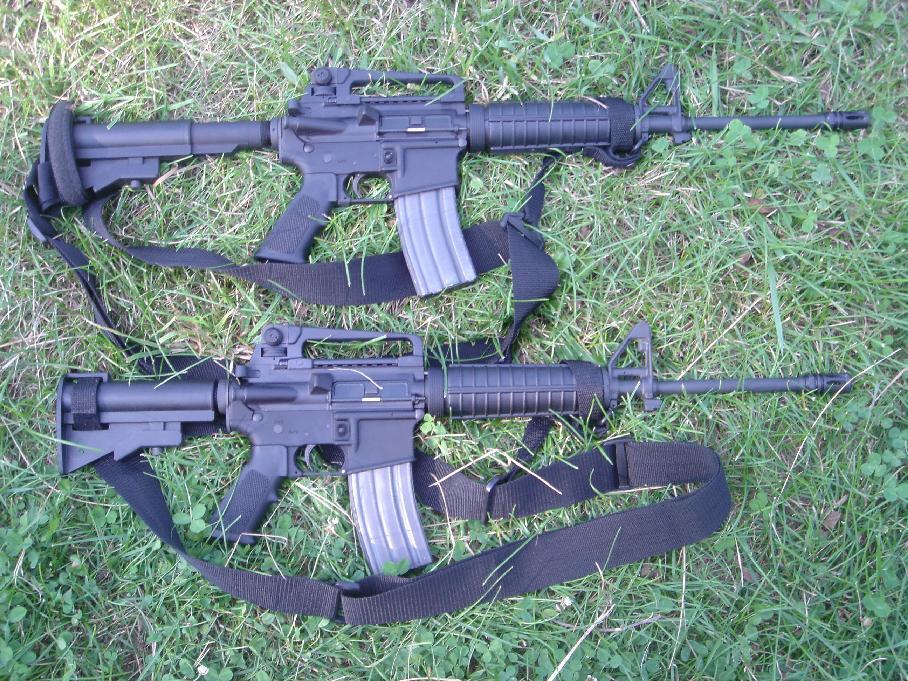
Next, we headed to Model 1 Sales for parts kits. There we found very competitively-priced parts kits. The popular choice was a kit with a 16" lightweight 1-9" twist barrel, flash suppressor, A3 receiver (that is, an optics rail milled into the top of the receiver where the carry handle would normally be), removable carry handle, telescoping buttstock, and bayonet lug. With that, the total rifle cost came to just under $600. Not too bad...
Other accessories purchased included Gappers, muzzle covers, tactical slings, ammo, and magazines. One fellow found a place to order ex-illegal magazines marked "Law Enforcement/Government Use Only" for a good price. Since the markings on those are now meaningless, he bought several. Not only are they brand new top-quality magazines, but they'll be good mementos.
After getting back to one guy's bunker safehouse apartment, we broke out all the new toys and set to work putting everything together. We had a bunch of tools on hand, but the only ones we ended up needing were a couple of roll pin punches, a pair of needle-nose pliers, a stock wrench (only needed for the telescoping stocks) and a small hammer. The uppers in our kits were preassembled, so we didn't have to mess with attaching the barrel or front sight block - but the lower assembly really was as easy as rumor said it would be. It's literally nothing more than dropping parts in place and tapping in pins. The most technical obstacles were trimming down a couple over-length springs and giving roll pins slight crimps. I won't go into the step-by-step details, as it really requires pictures, and any parts kit you buy should come with an instruction sheet.
The completed guns are very cool, though not quite the equivalent of commercially purchased ones. The triggers are heavy and a bit gritty, and several of the spring-loaded parts (charging handle catch and bolt hold-open, primarily) are too stiff. This is probably because we didn't polish any mating surfaces prior to assembly - things should smooth out a bit as the guns are broken in.
And speaking of breaking them in, it's time for me to head off to the range...
Posted by Claire @ 06:40 AM CST
Link